Introduction
CrownLabs allows users to access their VMs through a local SSH client (i.e., executed on their local machines).
This guide shows how to generate a SSH key pair on your operating systems (Windows, Linux, MacOS), how to load it on CrownLabs and access your CrownLabs' VM using SSH from a local terminal.
Additionally, many code editors, such as VS Code, can be connect to the CrownLabs VM over SSH and simplify the programming experience.
Note that the generation of the SSH key pair and the upload of the SSH public key does not have to be repeated each time you create a new VM. This process only needs to be done once per device.
How it works
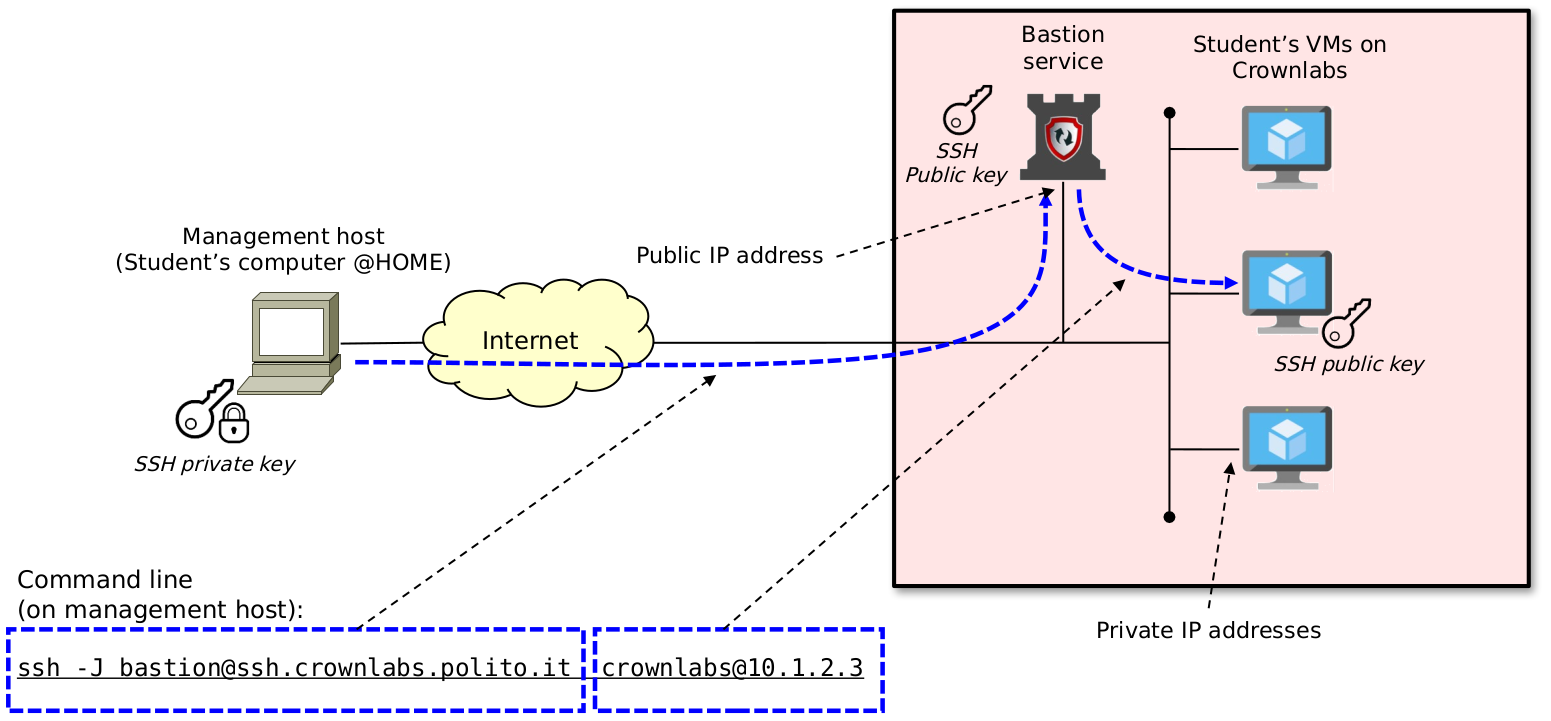
All CrownLabs VMs are characterized by private IP addresses, and cannot be accessed directly through SSH. As shown in the figure below, it is necessary to first establish the SSH connection through a bastion, which instead is publicly accessible, and then jump to the final destination (i.e., the VM).
This can be achieved with the ssh -J bastion@ssh.crownlabs.polito.it crownlabs@10.1.2.3 command, in which the local SSH client first connects to the bastion (indeed, the -J option specifies a ProxyJump), leveraging the generated SSH key-pair for authentication purposes.
Specifically, the bastion checks the client’s authentication attempt using the public key previously uploaded to the CrownLabs Dashboard.
If authentication succeeds, you are then redirected to your VM. Indeed, the second part of the command is the standard user@ipadress, where user is crownlabs (the default user on each VM) and ip is your VM’s IP address. The VM will authenticate you through your SSH key-pair, as the bastion previously did. Alternatively, it might fallback to traditional password authentication (which is crownlabs).
How to generate an SSH key pair
-
Open a terminal and run the following command to create a RSA key pair:
ssh-keygenYou can use the
-boption to specify the length (in bits) of the key, as shown in the following example:ssh-keygen -b 2048 -
The command will prompt you to enter the path to the file where you want to save the key. A default path and file name similar to
/home/user_name/.ssh/id_rsa(C:\Users\username\.ssh\id_rsaon windows) are suggested in parentheses. To accept the default path and file name (suggested), press Enter. Otherwise, enter the required path and file name, and then press Enter. Beware that from now on, this tutorial will assume you accepted the default settings. -
A password will be asked. You are free to insert one or to ignore it.
Now you will find in the previously chosen path ($HOME/.ssh or C:\Users\%USERPROFILE%\.ssh if you kept the default one) a file with a .pub extension (id_rsa.pub as default). This file contains your SSH public key.
Note that the directory contains a file called id_rsa (without .pub); this is the SSH private key which must not be shared with others.
Print the content of your SSH public key typing cat $HOME/.ssh/id_rsa.pub (Linux) or opening %USERPROFILE%\.ssh\id_rsa.pub with an editor such as notepad (Windows).
Upload your key on CrownLabs
Now open your page on CrownLabs and go to the Account page.
- In the central box you will see a tab called SSH key. Click it to navigate to the SSH keys management panel.

- Now click on Add SSH key to open a popup that will allow you to upload your key.
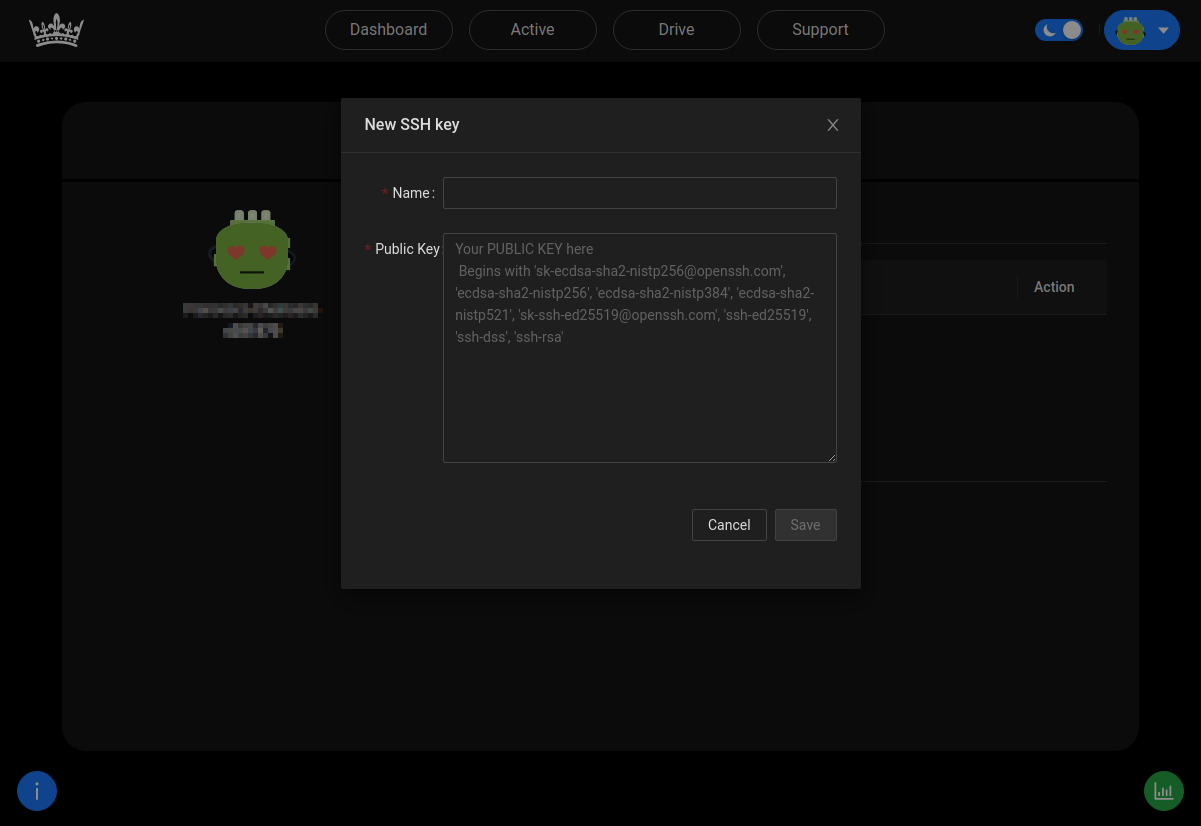
- Paste your Public key (previously copied) inside the popup and add a Name to later identify it (whatever you want).
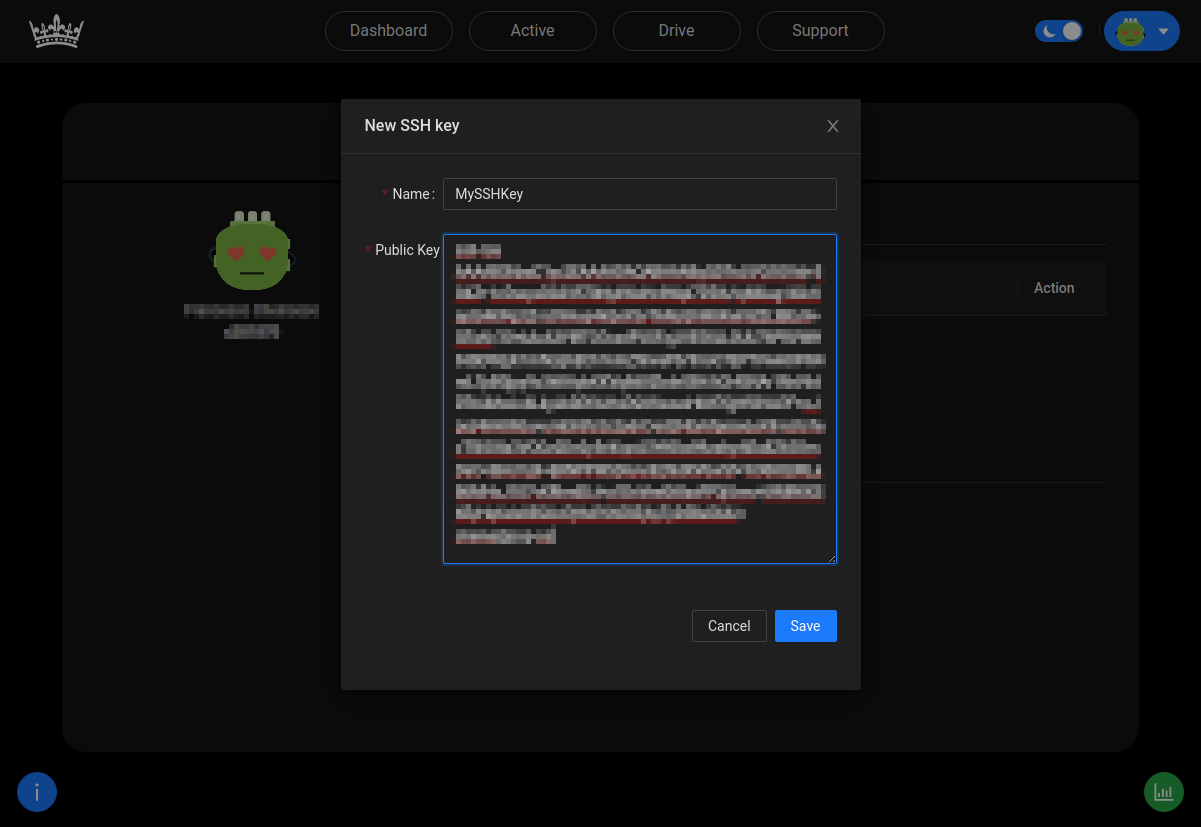
- Now click on Save, the popup will close and your SSH public key will be uploaded.
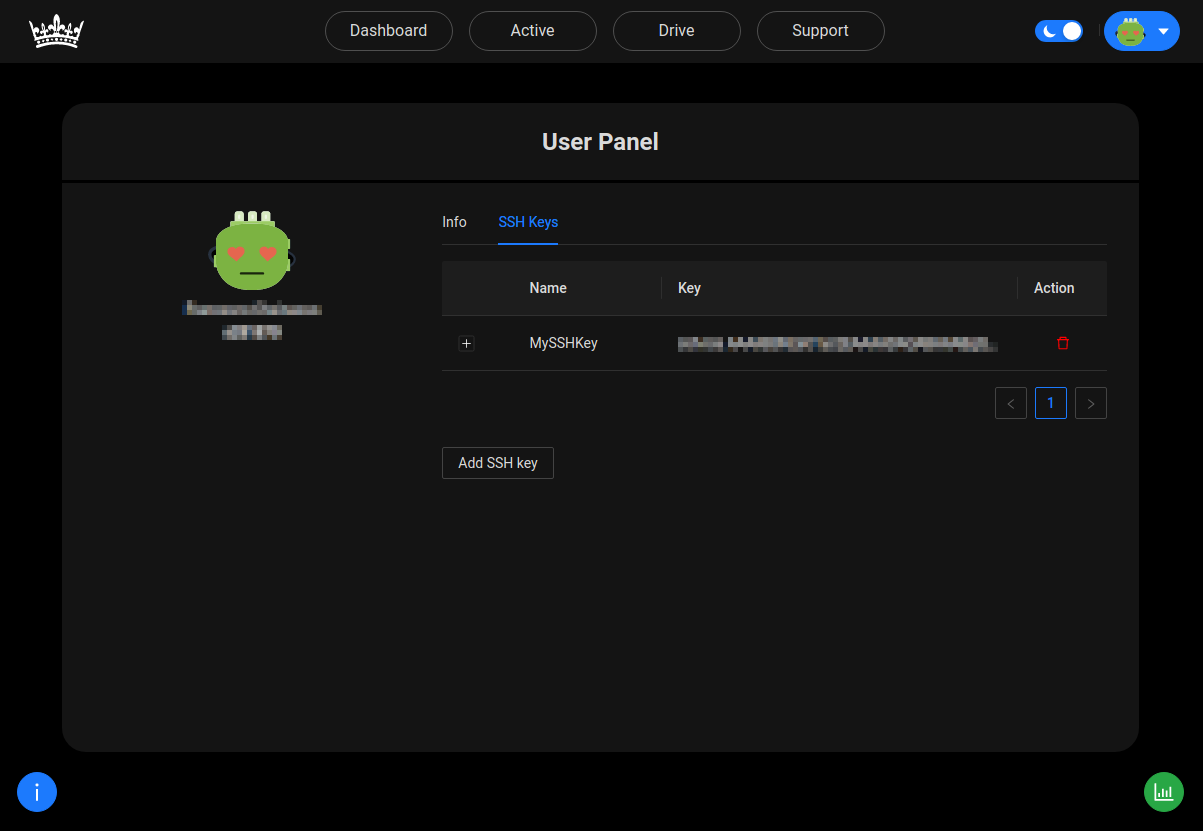
When completing this process, CrownLabs will push automatically the above SSH key in all the console-based VMs you created, as well in the Bastion host; therefore you will be able to connect to all the above VMs using your key.
Note that the SSH key is pushed in the target VM only when the VM is started for the first time. Therefore you may need to delete running VMs for this new configuration to be applied.
Connect to a VM from terminal
- Create an instance of a VM in your CrownLabs Dashboard page.

- Now move to the Active page and click on the SSH icon inside the row of the VM that you have just created. A popup with a shell command inside will be shown, copy that command.
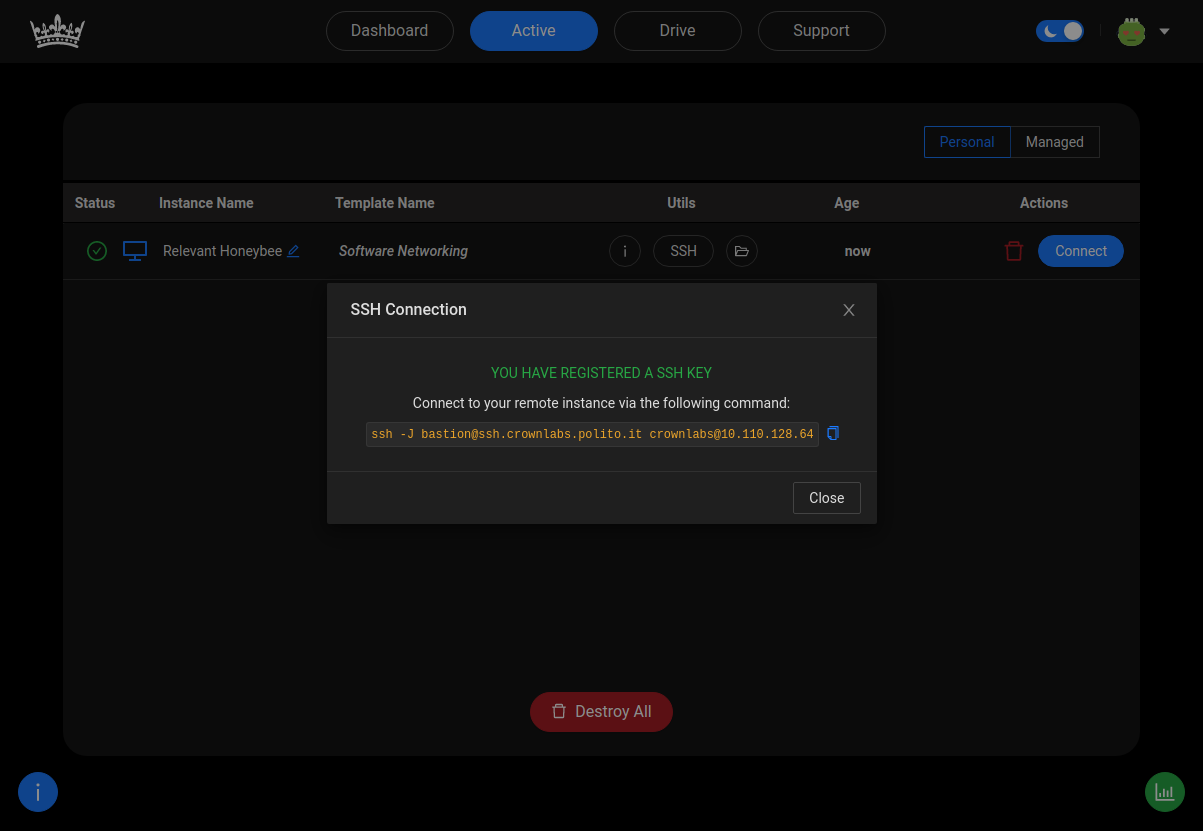
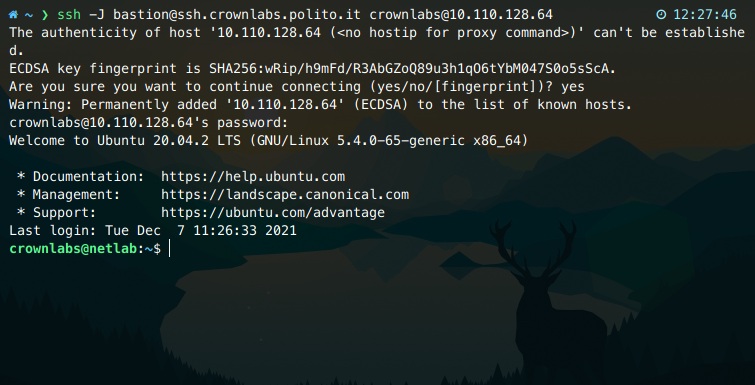
- Now open a terminal, paste the previously copied command and run it. A prompt asking if you trust the host you are trying to connect with will appear. Type yes and press Enter. Then another prompt asking for a password might appear. Type crownlabs and press Enter to login inside your VM.
Connect VS Code to a VM
-
Install the Remote - SSH extension.
-
Edit the SSH configuration file. The default location is
~/.ssh/configon Linux andC:\Users\<your_user>\.ssh\configon Windows. -
Append the following configuration, inserting the IP address of your VM (it can be found in the SSH connection command:
ssh -J bastion@crownlabs.polito.it crownlabs@<your_vm_ip>), and save.
Host bastion
	HostName ssh.crownlabs.polito.it
	User bastion

Host crownlabs
	HostName <your_vm_ip>
	ProxyJump bastion
	User crownlabs
-
Click on the Open a Remote Window button in the bottom-left corner of Code.
-
Click on Connect Current Window to Host.
-
Select crownlabs.
-
On Windows, select Linux as the platform.
-
Your VS Code is now connected to the CrownLabs VM, you can open a remote terminal by using Ctrl+J and open a remote folder as a project.
Conclusion
Now you are able to log in your VMs using SSH. In case you want to access from different PCs you can add other keys following the same process.
If you are interested in an advanced tutorial about SSH key you can read this page on Gitlab.